Monday, November 30, 2009

Glueing the planks together


First the seams are wetted with neat epoxy resin and a brush with the bristles chopped down. The seam here is fairly wide but who cares, I'm not getting paid for this. Plenty of thick epoxy will sort that out.


Here are some seams filled with thickened epopxy. I didn't have any proper filler when I started filling the top (vertical) seams so I used a belt sander to make some sanding dust and used that instead. This is fine especially as I am taping both sides of the seams with two inch glass tape. For the lower (horizontal) seams I used West 403 filler mixed with some 405 filler and sanding dust to darken it. We'll be standing on those seams so I want them to be strong. This photo also shows some small peices of wood used to align the planks. Those planks that were not conforming were tied together using garden wire. Mostly I used cable ties.


When the epoxy cures the ties and wires can be removed and the gaps filled.
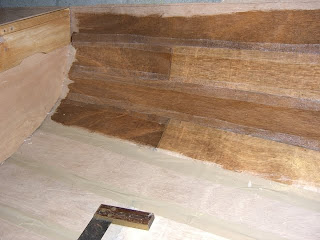

I filled the top three seams and taped them on the inside before I turned the boat over to fill the next three seams potherwise I would have been pushing epoxy into a vertical gap and it would have dripped out. I taped these seams to make sure the boat didn't fall apart as it is still very fragile at this stage. I got two guys to help me turn it over which we did on the grass outside the house in case it fell. The above photo also shows the packing tape used to cover the seams and keep epoxy resin from dripping out.




Saturday, November 21, 2009

Stitching the planks

All the planks, frames and the transom are now stitched together. It has taken 60 hours spread over 28 days to get to this point.


The photo above shows some of the hull planks held together by 2.5mm cable ties spaced at 200mm.

Here is a close up of the hull planks from the inside showing the cable ties.


Cable-ties arn't strong enough to hold some of the planks together at the bow so I have a clamp as well.


This is the temporary central frame. The actual frame will be on either side of the centreboard and will be in two peices but there has to be something there for the moment to keep the bpoat in shape.


This the actual forward frame - although it will be lower and will have an access hole cut in it when the boat is finished. It is spreading out the front of the boat so there is a lot of tension at the joints. Cable ties aren't strong enough here so this is stitched into place with plastic coated steel wire. You can also see the plastic tape with which I have covered the seams on the inside. This is to stop epoxy dripping through the seams when the boat is turned over.


Saturday, November 14, 2009

All planks cut and smoothed

All planks are now cut to shape and the edges smoothed with a plane. The scarf joints in the planks were sanded with a belt sander. Now time to start stitching.

Friday, November 13, 2009

Transom


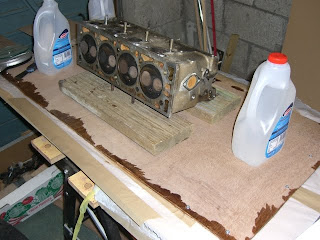
The transom is cut from a sheet made of two 6mm sheets sandwiched together. You need something fairly heavy to squash the sheets together and force out the thickened epoxy. I used the cylinder head from a 1984 Porsche 924 which I flung into a ditch a few years ago and wrote off. I am marginally better at driving than at sailing but at least the speeds are slower when sailing!


Wednesday, October 28, 2009

Marking out the planks


Next Job is to mark out the planks for cutting. I wasn't able to reach over the sheet to draw the lines for planks 3, 4 and 5 until I had cut out planks 1 and 2. Used a tiling edge to make the curves and raided the cupboard for some cans. As I said, its always useful to have a good supply of cans in case of global armageddon, killer bird flu or spontaneous boatbuilding.

Tuesday, October 27, 2009

Scarphing the plywood sheets

The planks for the Stornoway 12 are longer that the length of a sheet of ply and as I hate trying to scarph individual planks, I thought I would just scarph the entire sheets and cut the planks from the extra long sheets. The hard part about scarphing is lining up the planks so that they are straight. If you cut the planks from extra long ply then you don't have this problem. It is actually easier to line up two 8x4 sheets (if you have the space).


Scarphing is along the usual lines starting off with a plane and then moving to a belt sander. You can see from my ply that I am using a 1-4-1 mm ply. It is a mixture of red and white meranti.


Lining up the edges to keep it straight is fairly easy with a straight peice of wood and can even be done by looking down the straight edge. I didn't need to scarph two 8ft sections as none of my planks are longer than 13 foot so I cut off a 5ft section from one sheet and scarphed an 8ft sheet to a 5ft section of the other sheet.


To weight down, simply empty your cupboards of anything heavy but try not to get the epoxy or sanding dust in the dry goods as your partner may object to this on health and safety grounds.


Whoever said it wasn't a good idea to always keep plenty of canned goods in the home !!!