Thursday, September 29, 2011

Inner Stem


The inner stem is laminated from six 5mm x 35mm strips of Douglas Fir.

First the curve is drawn onto a piece of wood, in this case a flat sheet of MDF. The strips are bent around the curve and clamped onto blocks of wood placed along the curve. Naturally the MDF has to be covered in a plastic bin liner and the blocks have to be covered to prevent the inner stem from sticking to the template.


Even 5mm strips can break when bent around a tight curve, so I heated them over some boiling water (in that old Le Creuset we bought when we got married - knew it would eventually come in useful) to allow them to bend more easily. They say you should steam the wood one hour for every inch of thickness. I only got 15 minutes before herself wanted the hob for lunch but it was enough.


All the wood was wetted out with neat epoxy and allowed to soak for a couple of hours. Then the strips were glued together lying flat with thickened epoxy before being presented to the template. I clamped the upper end together first and then went around the curve as shown. A lot of clamps are needed. The laminated wood has to be banged flat to the MDF as well to keep the pieces flush.


Given the tight curve in the wood I left it for two days before I took off the clamps otherwise the wood might spring out of the correct curve while the epoxy was only partially cured. When the clamps are removed the edges of the piece are covered in epoxy which has to be shaved off.


Finaly the stem is shaved down into a triangular profile to fit into the front of the boat where is is sat into a bed of thickened epoxy. The planks are then screwed to the stem before the epoxy cures to hold them firmly to the stem. Each plank was fixed with two 25x5 stainless steel screws.


Monday, September 26, 2011

Construction timber


The internal structure of the boat, gunwales, runners, mast and spars will be made from Douglas Fir. The wood was cut from a log in Clonmore sawmills near Tullamore, Co Offaly. The picture above shows the automated bandsaw which can take the massive log and churn it out in the form of 5 meter matchsticks if you want. The picture below shows some of the wood getting spat out at the other end of the machine.


This rough sawn timber was then taken to a joiner in Toomevara and cut up further, to specifics given in the plans and planed smooth. When I put it on the car in Clonmore I thought the roof rack would break with the weight of it. By the time the guy in Toomevara got finished it weighed a bit less.


Tuesday, June 14, 2011

Scraping smooth and taping outer seams.


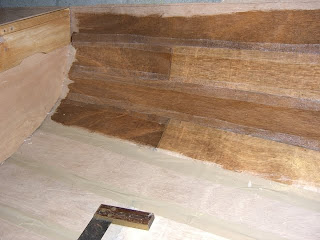
All longitudional seams on the boat are now filled and scraped smooth. However, around here, anything left lying around for more than 10 minutes is likely to be converted into a house of some sort.


Seams were scraped smooth and sanded lightly. Then the entire outside was painted with epoxy and 50mm tape was laid along the seams as below.


Monday, November 30, 2009

Glueing the planks together


First the seams are wetted with neat epoxy resin and a brush with the bristles chopped down. The seam here is fairly wide but who cares, I'm not getting paid for this. Plenty of thick epoxy will sort that out.


Here are some seams filled with thickened epopxy. I didn't have any proper filler when I started filling the top (vertical) seams so I used a belt sander to make some sanding dust and used that instead. This is fine especially as I am taping both sides of the seams with two inch glass tape. For the lower (horizontal) seams I used West 403 filler mixed with some 405 filler and sanding dust to darken it. We'll be standing on those seams so I want them to be strong. This photo also shows some small peices of wood used to align the planks. Those planks that were not conforming were tied together using garden wire. Mostly I used cable ties.


When the epoxy cures the ties and wires can be removed and the gaps filled.


I filled the top three seams and taped them on the inside before I turned the boat over to fill the next three seams potherwise I would have been pushing epoxy into a vertical gap and it would have dripped out. I taped these seams to make sure the boat didn't fall apart as it is still very fragile at this stage. I got two guys to help me turn it over which we did on the grass outside the house in case it fell. The above photo also shows the packing tape used to cover the seams and keep epoxy resin from dripping out.


Saturday, November 21, 2009

Stitching the planks

All the planks, frames and the transom are now stitched together. It has taken 60 hours spread over 28 days to get to this point.


The photo above shows some of the hull planks held together by 2.5mm cable ties spaced at 200mm.

Here is a close up of the hull planks from the inside showing the cable ties.


Cable-ties arn't strong enough to hold some of the planks together at the bow so I have a clamp as well.


This is the temporary central frame. The actual frame will be on either side of the centreboard and will be in two peices but there has to be something there for the moment to keep the bpoat in shape.


This the actual forward frame - although it will be lower and will have an access hole cut in it when the boat is finished. It is spreading out the front of the boat so there is a lot of tension at the joints. Cable ties aren't strong enough here so this is stitched into place with plastic coated steel wire. You can also see the plastic tape with which I have covered the seams on the inside. This is to stop epoxy dripping through the seams when the boat is turned over.


Saturday, November 14, 2009

All planks cut and smoothed

All planks are now cut to shape and the edges smoothed with a plane. The scarf joints in the planks were sanded with a belt sander. Now time to start stitching.

Friday, November 13, 2009

Transom


The transom is cut from a sheet made of two 6mm sheets sandwiched together. You need something fairly heavy to squash the sheets together and force out the thickened epoxy. I used the cylinder head from a 1984 Porsche 924 which I flung into a ditch a few years ago and wrote off. I am marginally better at driving than at sailing but at least the speeds are slower when sailing!