Monday, July 9, 2012

Centreboard and case

The centreboard is made from two peices of 9mm ply sandwiched together and it pivots on a 10mm stainless steel bolt. Here are some photos of the construction of the centreboard case and central frame.


Two halves of the centreboard case with the 25x50 mm frames. The sheets were sandwiched onto 25x50 ends as well.


A 9mm reinforcement section was added where the pivot bolt hole would be drilled.


Inside was coated with 5 coats of neat epoxy.


.....not forgetting the inside of the pivot bolt hole.


Two Halves were then joined together


squeezing out the glue, but not all of it.


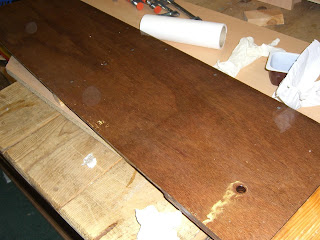
Meanwhile the two sheets of 9mm ply for the centreboard were prepared.


Added on a section at the end of the centreboard to bring it up to the correct length.


Tried it out to make sure it all worked.


Then lined up the case on the hull to cut out the hole.


Pre-drilled some holes for 4x25 screws to hold it to the hull.


Put a bed of thickened epoxy around the hole.


I scored the bottom of the case frame and coated with neat epoxy.


Epoxy fillet was rounded off at the bottom of the case. Excess glue scraped away.


Before it cured, I rigged up something to keep it straight and upright.


25x50mm frames were inserted between the hull and case for the thwart and the central frame was put in. I may have made the hole in the frame too big but sure I'm not getting paid to do this!

Friday, July 6, 2012

Rubbing Strips

The rubbing strips were done lat year. I decided to put them on to give the boat a more classic appearance. they are not part of the plans but similar boat have them and they look good. Also I had the wood left over from the outwales. They are the same 15x25 strips used for the outwales. I put them at the bottom of the top plank in the hull. They were glued into place and screwed from inside the hull with 4 x 20 screws every 20cm. Putting them on was one of the hardest jobs on the boat up to that point. my daughter held the rubbing strip while I screwed it to the bow and worked my way aft, all the time it was dripping glue. I had to press it hard against the hull and reach over with my other hand and screw in the stainless steel slotted countersunk screws. I used a lot of bad language that evening. Daughter heard all of it.

To keep the tension on the strip at the aft end of the boat I tied the strip to the opther side of the boat and left it there for a day or two. After the epoxy cured I redid the screws and countersunk them properly. I removed the excess from the aft section.


To make sure that the starboard strip was in the same place as the port strip I cut sections of wood and placed them between the outwale and rubbing strip and various distances. I recorded these distances and marked the corresponding positions on the other side of the hull. I then taped the peices of wood to the hull as shown below.

I trial fitted the starboard rubbing strip to the hull and marked its position with a pencil. The photo above shows the gunwales with the hull sitting above them. This is because I didn't cut that plank along the line deliberately so that I could plane down to the gunwales when they were fitted - much easier to get a good finish if you do it like this - or at least it is for me. The starboard strip was tied to the port side of the boat to maintain the tension on the wood. Most of the tension is at the bow but you can screw it into the inner stem which gives it a good hold to start.

The photo below shows the starboard rubbing strip in position. Bot rubbing strips and gunwales were positioned with a couple of centimeters jutting out beyond the front of the hull. This was to allow them to mate up with the outer stem which has yet to be fitted. (At this point of writing it has actually been fitted. This work was done last year).


The excess wood from the rubbing strip and gunwales was removed carefully so that the outer stem could slot into the space.


Below the finished result. Total time was about six hours. Should see more photos of it later.